If you’ve ever walked your RV roof and noticed raised bubbles, blisters, or soft bulges, you’re right to be concerned. RV roof bubbles are not cosmetic issues. They are often early warning signs of moisture intrusion, adhesive failure, or material breakdown.
In this guide, you’ll learn what causes RV roof bubbles and blisters, how serious they are, and what to do before they turn into costly repairs.
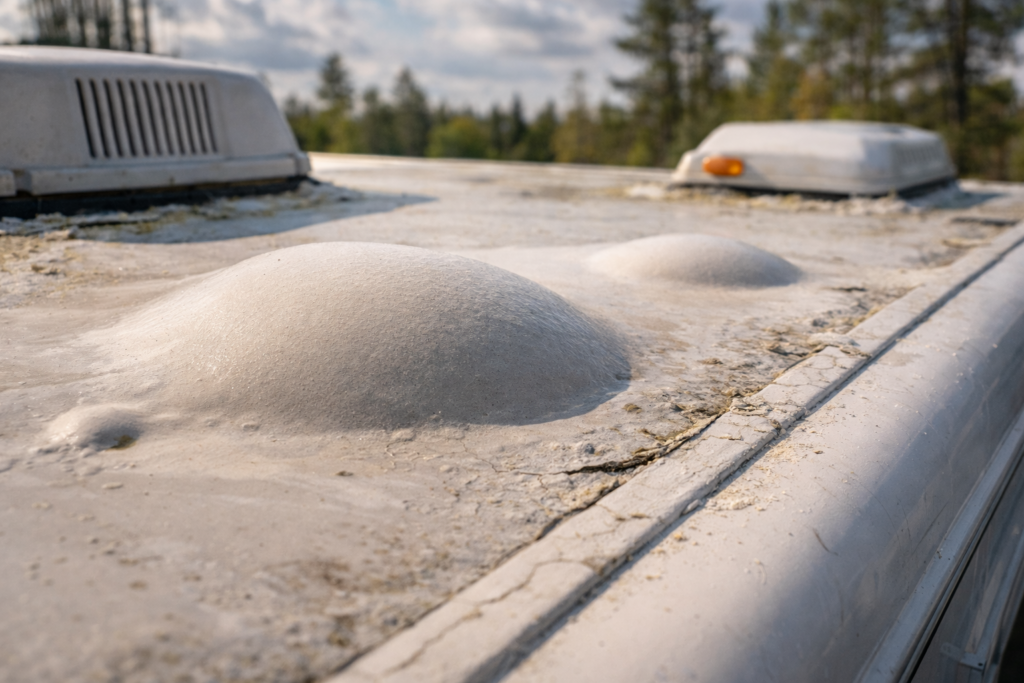
What Are RV Roof Bubbles and Blisters?
RV roof bubbles (sometimes called blisters) are raised areas where the roof membrane lifts away from the underlying surface. They may feel:
-
Soft or spongy
-
Firm but raised
-
Warm or hollow when pressed
These bubbles commonly appear on EPDM and TPO rubber RV roofs, but they can occur on other roof types as well.
If you are unsure what type of roof you have, see:
How to Identify What Type of RV Roof You Have
1. Trapped Moisture Under the Roof Membrane
The most common cause
Water that enters through:
-
Failed sealant
-
Cracked seams
-
Loose roof accessories
can become trapped beneath the roof membrane. When the sun heats the roof, that moisture expands into vapor, pushing the membrane upward and forming bubbles.
This often happens after:
-
Heavy rain
-
Snow melt
-
Repeated freeze-thaw cycles
Related reading:
Signs of Hidden RV Roof Water Damage
2. Adhesive Failure Between Layers
RV roof membranes are bonded to the roof deck using adhesive. Over time, that adhesive can:
-
Dry out
-
Lose flexibility
-
Break down from heat or age
When adhesive fails, the membrane separates from the deck, allowing air or moisture to create raised blisters.
This is especially common in hot, sunny climates where UV exposure accelerates aging.
3. Heat Expansion and Temperature Swings
RV roofs constantly expand and contract due to temperature changes. Large swings between:
-
Hot days and cool nights
-
Summer heat and winter cold
can stress both the membrane and the adhesive beneath it.
Over time, repeated expansion causes weak points where bubbles form, especially near:
-
Roof edges
-
Seams
-
Around vents and skylights
4. Poor Ventilation Under the Roof Surface
Some RVs trap heat and moisture beneath the roof membrane due to:
-
Poor airflow
-
Insufficient insulation design
-
Sealed layers with no moisture escape path
When moisture has nowhere to go, it builds pressure under the membrane, leading to blistering.
5. Improper Repairs or Resealing
DIY repairs done incorrectly can actually cause roof bubbles, especially when:
-
Sealant is applied over wet surfaces
-
Incompatible products are used
-
Old sealant is not removed before resealing
Trapped moisture under new sealant often leads to blistering weeks or months later.
Helpful guide:
Common RV Roof Repair Mistakes to Avoid
6. Manufacturing Defects (Less Common)
In some cases, roof bubbles are caused by:
-
Improper adhesive application at the factory
-
Air pockets trapped during installation
These usually appear early in the RV’s life and may be covered under warranty if caught quickly.
Are RV Roof Bubbles Always Serious?
Not all bubbles mean immediate failure, but none should be ignored.
Lower risk:
-
Small, firm bubbles that do not grow
-
No interior leaks or stains
Higher risk:
-
Soft or spongy bubbles
-
Growing or spreading blisters
-
Interior ceiling discoloration
-
Musty odors
If bubbles feel soft or are increasing in size, moisture damage is likely already present.
What To Do If You See RV Roof Bubbles
-
Inspect the area closely
Look for nearby cracks, seams, or failed sealant. -
Check inside the RV
Inspect ceilings and upper cabinets for stains or soft spots. -
Avoid puncturing the bubble
Cutting or popping a blister can make damage worse. -
Perform a leak test
Use controlled water testing if safe. -
Repair early
Small issues are far cheaper to fix than full roof replacement.
Related guide:
How To Test An RV Roof For Leaks Using The Hose Method
Can RV Roof Bubbles Be Repaired?
Yes, depending on severity:
-
Minor adhesive separation may be monitored
-
Moisture-related bubbles often require membrane repair
-
Advanced damage may require professional service
In some cases, roof coatings or partial membrane replacement may be recommended.
Final Thoughts
RV roof bubbles and blisters are not random defects. They are symptoms of moisture, heat, adhesive failure, or maintenance issues. Catching them early can mean the difference between a simple reseal and a full roof rebuild.
Regular inspections and climate-appropriate maintenance are the best prevention.