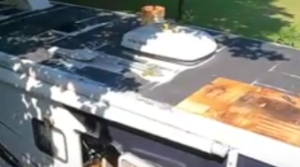
Water damage on your RV roof can compromise your home on wheels, leading to leaks, structural issues, and expensive repairs if not addressed promptly. In this article, we’ll explore RV roof water damage repair, steps to repair it effectively, and preventative measures to safeguard your RV roof for the long haul.

Understanding RV Roof Water Damage Repair
Water damage is a common issue among RV owners due to constant exposure to the elements. Over time, rain, snow, and even condensation can cause:
- Leaks and Moisture Intrusion: Water can seep through seams, vents, or poorly sealed areas.
- Structural Deterioration: Prolonged exposure weakens the roof’s materials, leading to soft spots or delamination.
- Mold and Mildew Growth: Moist environments foster the growth of mold and mildew, which can cause health issues and further damage.
Recognizing these issues early can save you significant time and money.
Identifying the Signs of Water Damage
Before beginning repairs, it’s essential to thoroughly inspect your RV roof. Look for these common indicators:
- Discoloration or Stains: Brown or dark patches can indicate water seepage.
- Blistering or Bubbling: Separation of the roof’s surface layers may signal trapped moisture.
- Cracked or Peeling Sealant: Damaged or worn sealant can let water penetrate the roof.
- Soft or Warped Sections: Areas that feel spongy or uneven might be deteriorating due to moisture.
- Visible Leaks: Water stains on the interior ceiling or walls are a clear sign of roof leakage.
Step-by-Step Guide to Repairing Water Damage
1. Assessment and Preparation
- Thorough Inspection: Carefully examine the entire roof surface for visible signs of water damage.
- Gather Materials: Collect necessary repair supplies such as a utility knife, scraper, epoxy or patching kit, sealant, sandpaper, and protective gear (gloves, mask, and glasses).
- Document the Damage: Take photos and notes to understand the extent of the damage and to share with a professional if needed.
2. Cleaning and Drying
- Remove Debris: Clean the roof surface by removing dirt, leaves, and any other debris.
- Dry the Area: Ensure the affected area is completely dry. Use a fan or allow natural drying time, as moisture can interfere with repair adhesion.
3. Repairing the Damaged Area
- Cut Out Damaged Material: Carefully remove any compromised sections of sealant or roof material using a utility knife or scraper.
- Apply a Patching Material: For minor damage, use a high-quality patching kit or epoxy designed for RV roofs. For larger areas, you may need to replace sections of the roofing material.
- Smooth and Sand: Once the patch is applied, smooth the surface with sandpaper to ensure a seamless repair.
- Seal the Repair: Apply a layer of sealant over the repaired area to create a watertight barrier. Follow the manufacturer’s instructions regarding drying times and additional layers.
4. Final Inspection and Testing
- Inspect the Repair: Check for any gaps or uneven areas that could allow water to re-enter.
- Water Test: If possible, simulate rainfall or use a hose to test the repaired area. Observe if any water penetrates the repair.
- Make Adjustments: If needed, add an extra layer of sealant or patch any spots that still show signs of leakage.
Preventative Measures to Avoid Future Water Damage
Regular Maintenance
- Biannual Inspections: Regularly inspect your RV roof, especially after harsh weather, to catch early signs of water damage.
- Clean the Roof: Remove debris and dirt frequently to prevent moisture buildup and mold growth.
Quality Sealant and Repairs
- Invest in High-Quality Products: Use sealants and patching materials specifically designed for RV roofs to ensure durability and adhesion.
- Professional Help: When in doubt, consult a professional RV technician to assess and repair extensive damage.
Protective Coatings
- Apply Protective Coatings: Consider using a UV-resistant roof coating to protect against sun damage and weathering.
- Reapply Sealant Regularly: Follow the manufacturer’s recommendations for reapplication to maintain a strong, watertight seal.
Water damage on an RV roof is a serious issue that requires prompt attention and proper repair techniques. By following this comprehensive guide – RV Roof Water Damage Repair, you can effectively restore your roof, protect your RV from further damage, and enjoy your adventures worry-free. Remember, regular maintenance and timely repairs are key to extending the life of your RV roof and keeping your mobile home safe on the road.